
Hello world 👋, my name is Francisco — fcoterroba on the internet — and today I’m bringing you a project that you really like because we set aside all the theory we already know (or should know) and put that theory into practice to make a practical project.
With this, we know that we enhance our CV NOT only with knowledge and titles (regulated and unregulated) but also with projects that could be perfectly real and valid in any company in the sector.
Today we’re going to do a medium-level project in Go (GoLang), the famous programming language developed by Google in 2009. We won’t go into much more detail about the language because, if you want to learn more about how it emerged and the first steps with it, I recommend this other post I made some time ago.
The project we’re going to do is one in which we’re going to create a static website with HuGo, a famous library of the language that allows us to create static websites very easily.
I remind you that some time ago I uploaded a video to my YouTube channel showing the installation of smart bulbs that can be controlled with Google Assistant or mobile. Here’s the video in case you haven’t seen it yet:
Finally, before we begin, I’ll show you one of my latest videos I made for TikTok. It’s part 3 of a series of videos where I show my favorite songs from this Eurovision 2023.
@fcoterroba My favorite Eurovision 2023 songs — PART 3 #eurovision #eurovision2023 #fyp #parati @Eurovision @Eurovisión TVE @Piqued Jacks @TVORCHI ♬ original sound - fcoterroba
Now let’s get started 👇
First step: Environment installation
As with almost any programming project I usually do, the first and most important thing is to install the appropriate environment. For this, we’ll need to install Go following the instructions on their own website as well as a code editor. In my case, I always use VSCodium.
Once we’ve done these two things, we’ll have our entire setup configured correctly to start programming. Simply, to verify the correct installation of the language, we’ll open a terminal and type:
go version

Second step: Project initialization
Next, since HuGo already comes as one of the “basic” parts of the language, we’ll simply need to do a quickstart, enter the directory it creates for us and initialize it in git since we’ll add some submodules later
hugo new site quickstart
+cd quickstart
+git init
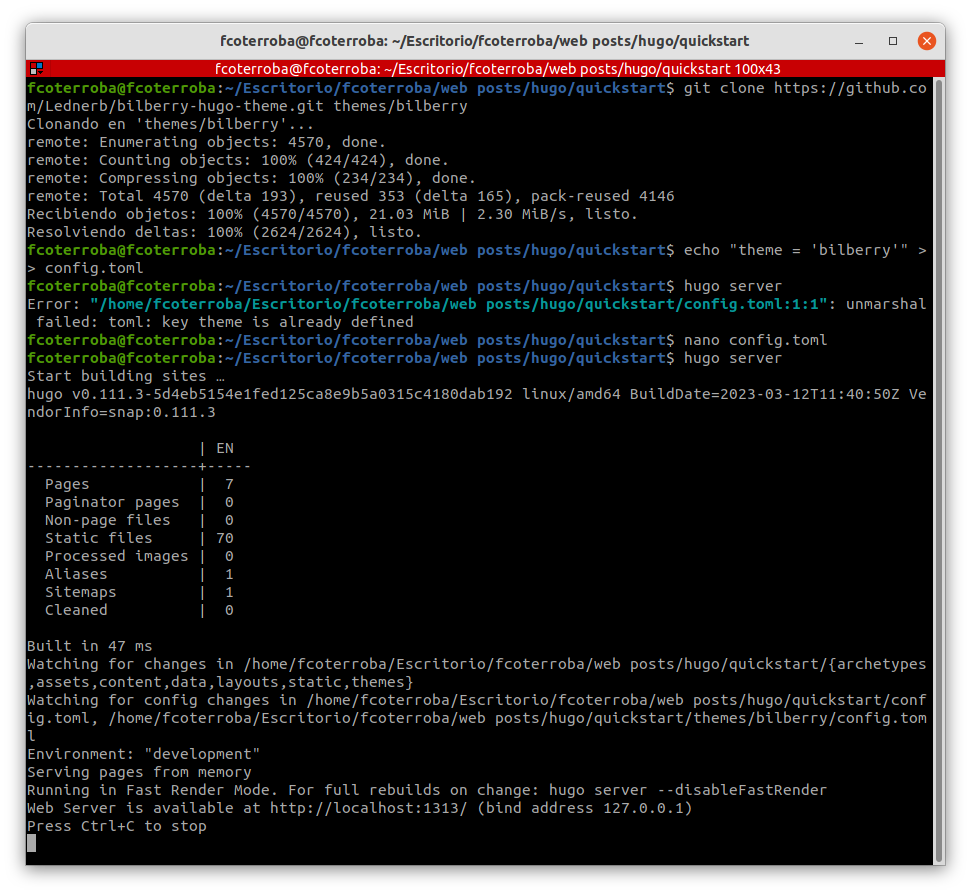
Next, we choose one of the hundreds of themes available on the Hugo page. In my case I’ll pick “bilberry” by cloning it into the themes directory and adding that configuration to the config.toml file.
Finally, with hugo server we can start our website locally
Third step: Filling our website with content
What would websites be in general if they didn’t have content?
Exactly that, the part that involved more “programming” we’ve already done, so now we just need to add some posts to the website.
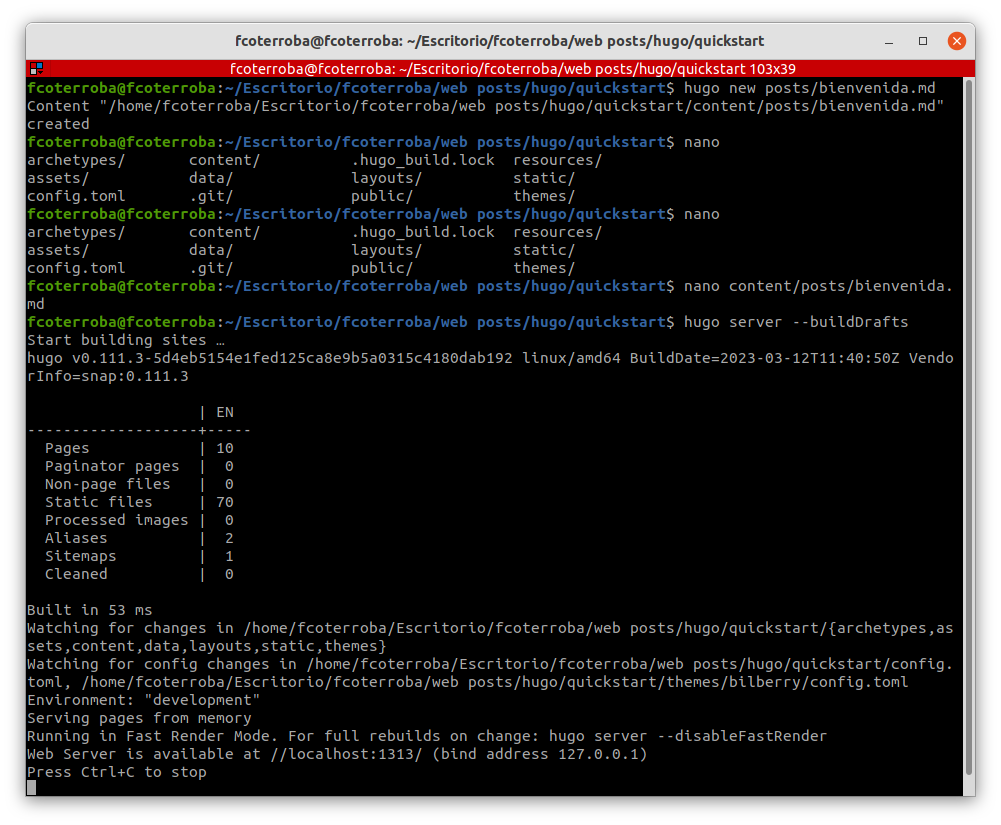
For this, we need to create a new file using the hugo new posts/pagename.md command, edit the content inside and then start the hugo server with the buildDrafts flag
Last step: Finalizing configurations
To finish, we save all the changes we’ve made, and that’s it.
If, for example, we want to upload this so it can be seen beyond localhost, we simply upload the entire directory to a hosting service like GitHub pages.
Check the last steps we did in our Python static website post since the steps are the same.
And that’s all for today. Thanks for reading until the end, I hope it was useful and you liked it. See you soon!
You can also support my work via Paypal. Any amount is truly appreciated! 🙂
I also hope you have a great week and we’ll see each other here soon! Greetings and remember to follow me on social media like Twitter, Facebook, Instagram, GitHub, LinkedIn and TikTok. 🤟🏻